Workspaces are a place to get your web stuff organized. It could be for a specific project, for a particular client, or just a place to help keep things up-to-date. With a selection of great widgets to choose from - from Tasks to RSS Feed - you should be able to curate a workspace, or multiple workspaces, to make your workday easier. Here are some of the exciting changes we've made to workspaces:
- Each workspace fills the main window.
- You can create as many workspaces as you like.
- Easily switch between your workspaces using the pop-out side-menu.
- Pin a workspace to any group so it appears in the sidebar.
- Choose which workspace appears in all new windows and tabs.
- Keep them private or share with a Connect team.
Getting Started.
Click on the workspace icon in the sidebar (four blue squares in a white square). Current users will see 'My First Workspace' populated with content from existing workspaces. New users will see a 'My First Workspace' example.
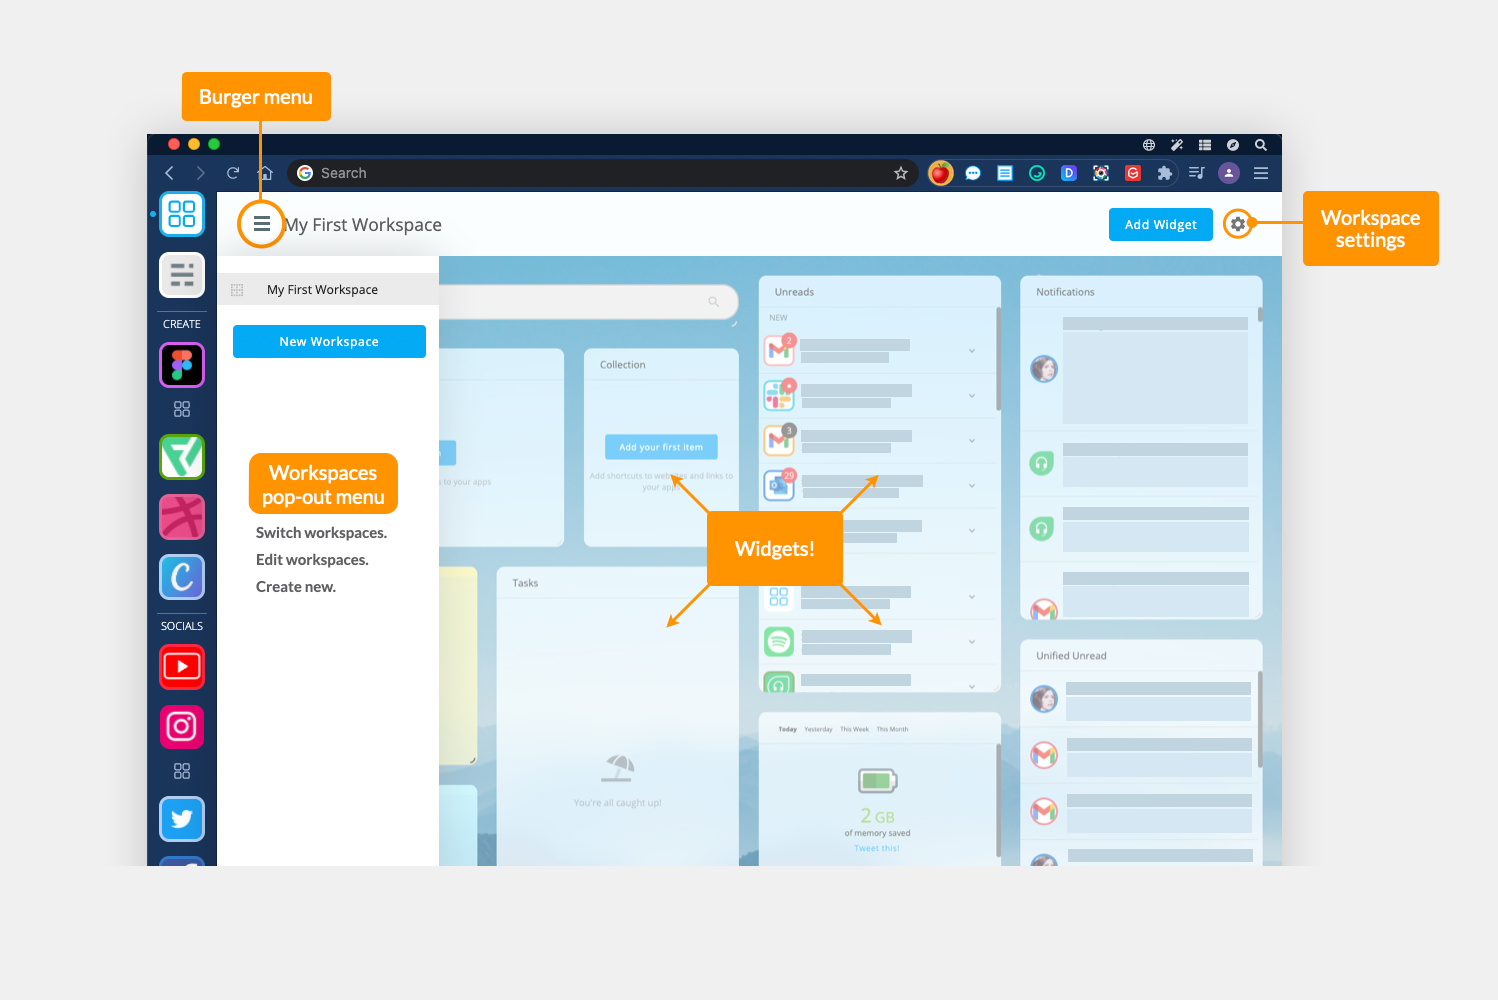
- Create & navigate workspaces: Click on the workspaces burger icon (three lines top-left) to pop-out the workspaces menu. From there you can switch between all your workspaces and create a new one.
- Edit a workspace: Highlight any workspace in the pop-out menu, then click on the kebab icon (three dots) and select 'Edit'. See below for more details on the edit screen.
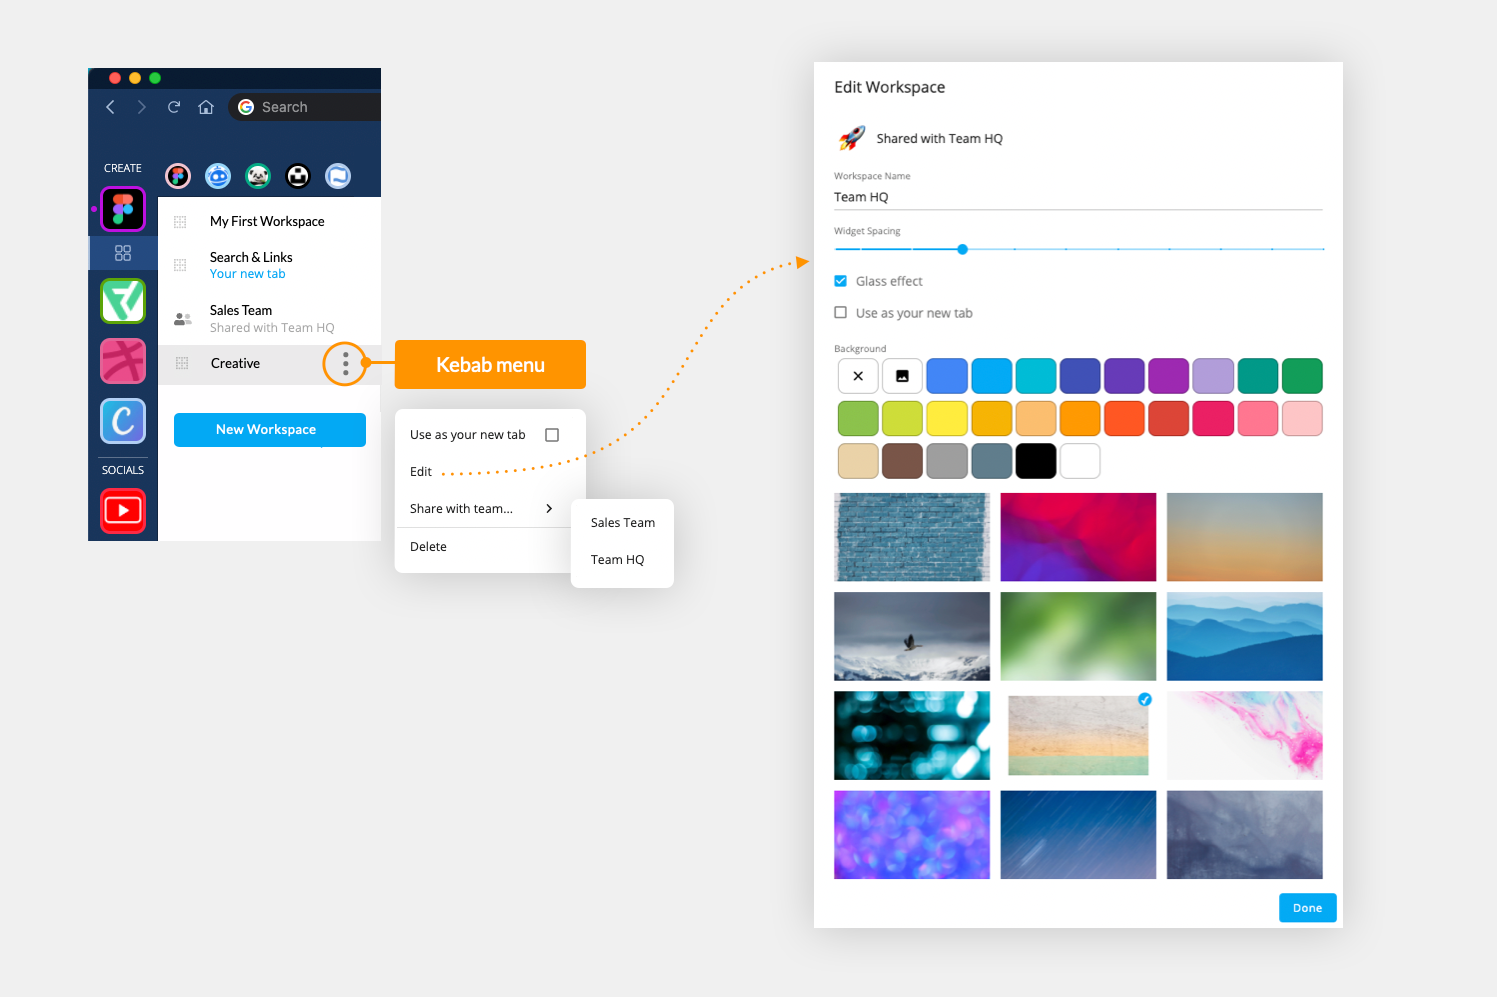
- Share a workspace: Highlight any workspace in the pop-out menu, and click on the kebab icon (three dots) followed by 'Share with Team'. Then select a Team name from the list. That workspace will instantly be visible in the workspaces menu for all team members. Team members will also get a desktop notification that the workspace has been shared, and an alert will appear in the Team Activity widget.
- Choose a workspace for your new tab: Highlight any workspace in the pop-out menu, and click on the kebab icon (three dots) followed by 'Use as your new tab'. That workspace will then appear in all new tabs and the label 'Your New Tab' will appear in blue under the workspace name.
- To pin a workspace to a group: When creating a new workspace, select the option to 'Pin to a Group', then choose a group from the list. A small workspaces icon will appear under the main group icon in the sidebar.
- To delete a workspace: Highlight any workspace in the pop-out menu, then click on the kebab icon (three dots) and select 'Delete'. Confirm you want to delete the workspace via the pop-up prompt.
Creating a New Workspace.
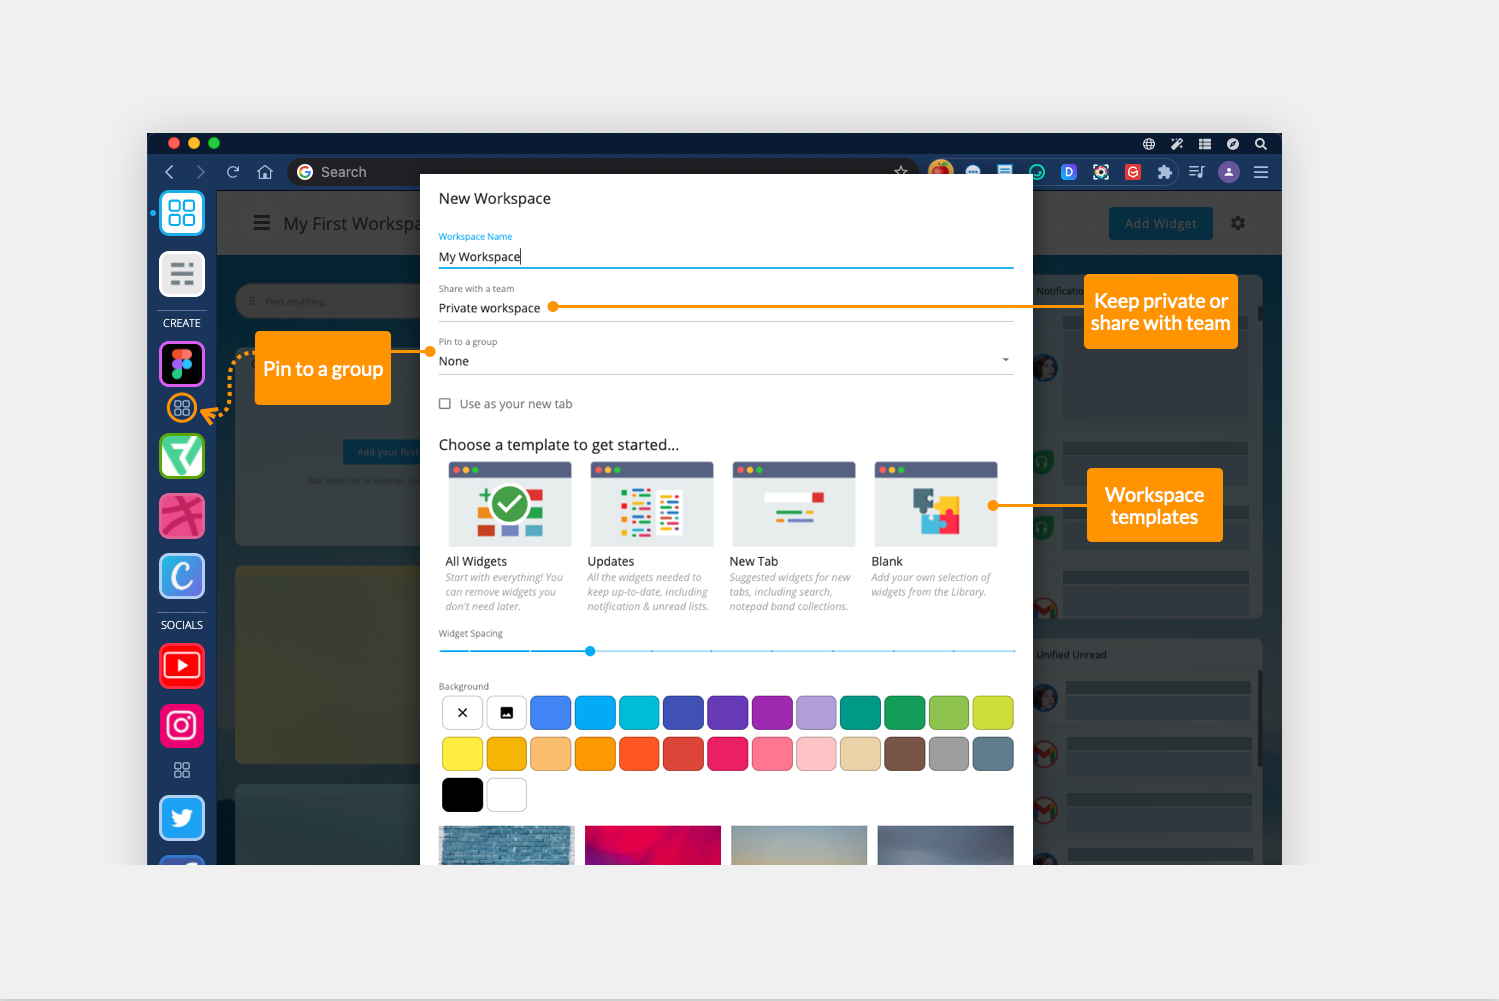
Click on the burger icon to pop-out the workspaces menu then select 'New Workspace'. This will pop-out a new window (shown above):
- Name: This name will appear in the workspaces menu for you and your team (if shared).
- Private or Share: Keep as private or click on the dropdown list to choose a team.
- Pin to a Group: Select a sidebar group from the dropdown list to add a link to the workspace in the sidebar.
- Use as your new tab: Check the box if you want this to be your new tab workspace.
- Choose a template: If you're new to workspaces, then try a template to discover new widgets. See the next section for more information about templates.
- Widget spacing: Toggle to slider to select spacing between widgets.
- Background: Select a solid colour, upload your own background, or choose from our library of images (courtesy of Unsplash!). https://unsplash.com/wallpapers
Workspace Templates.
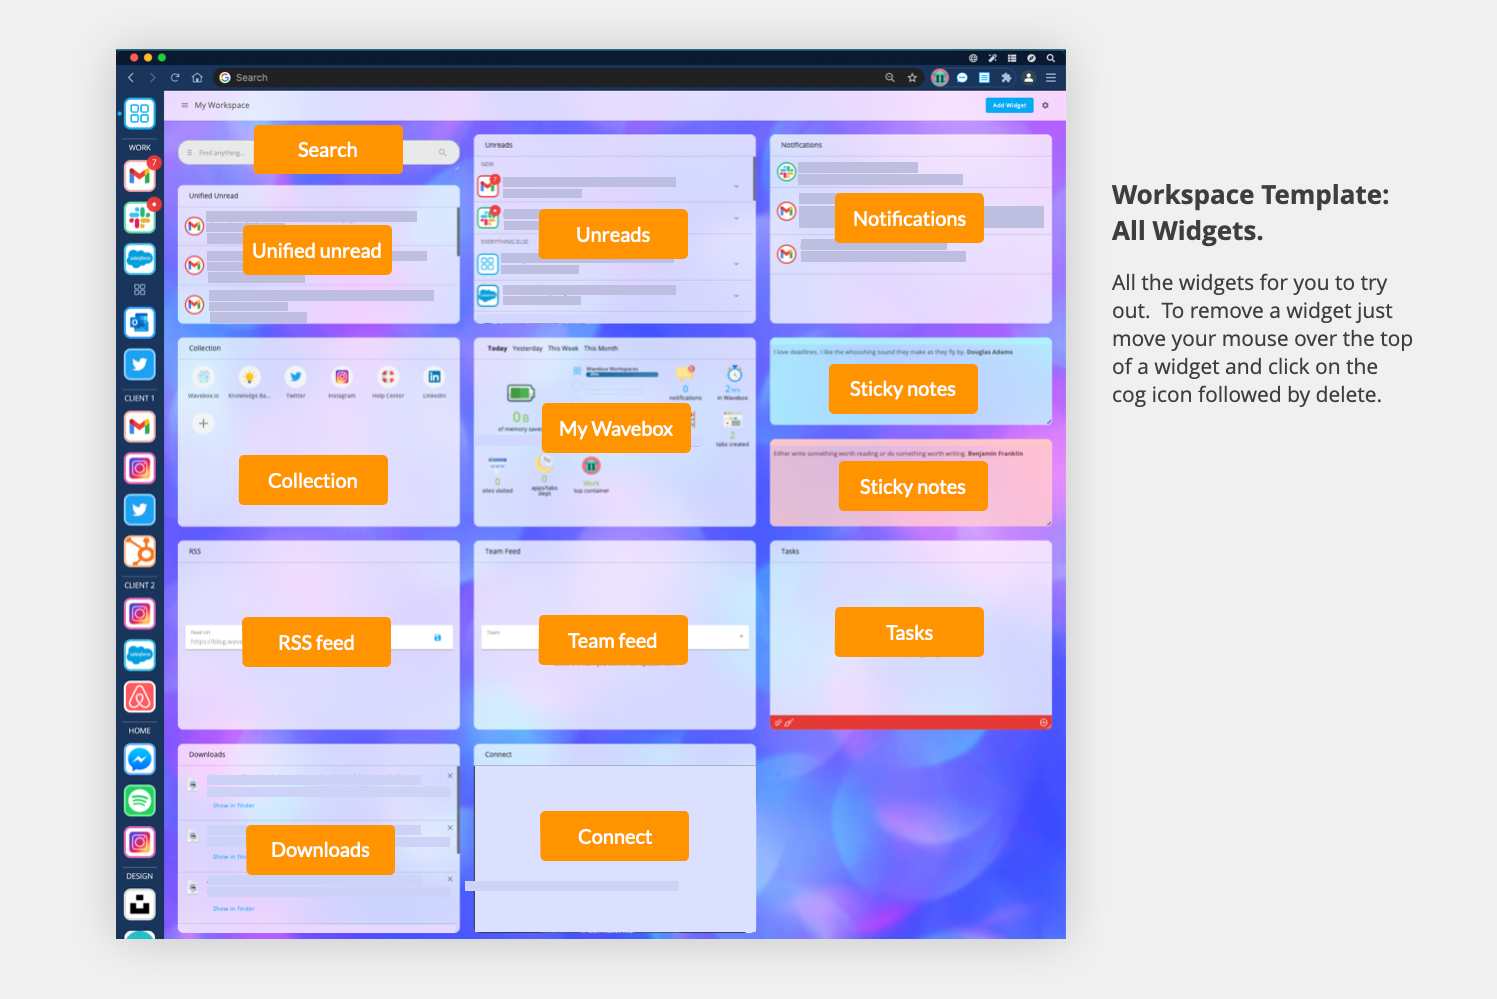
All Widgets - Choose this template is a simple way to test out all the widgets. There are 11 to choose from, so your workspace might look a little busy at first, but you can easily move or remove any widgets you don't need.
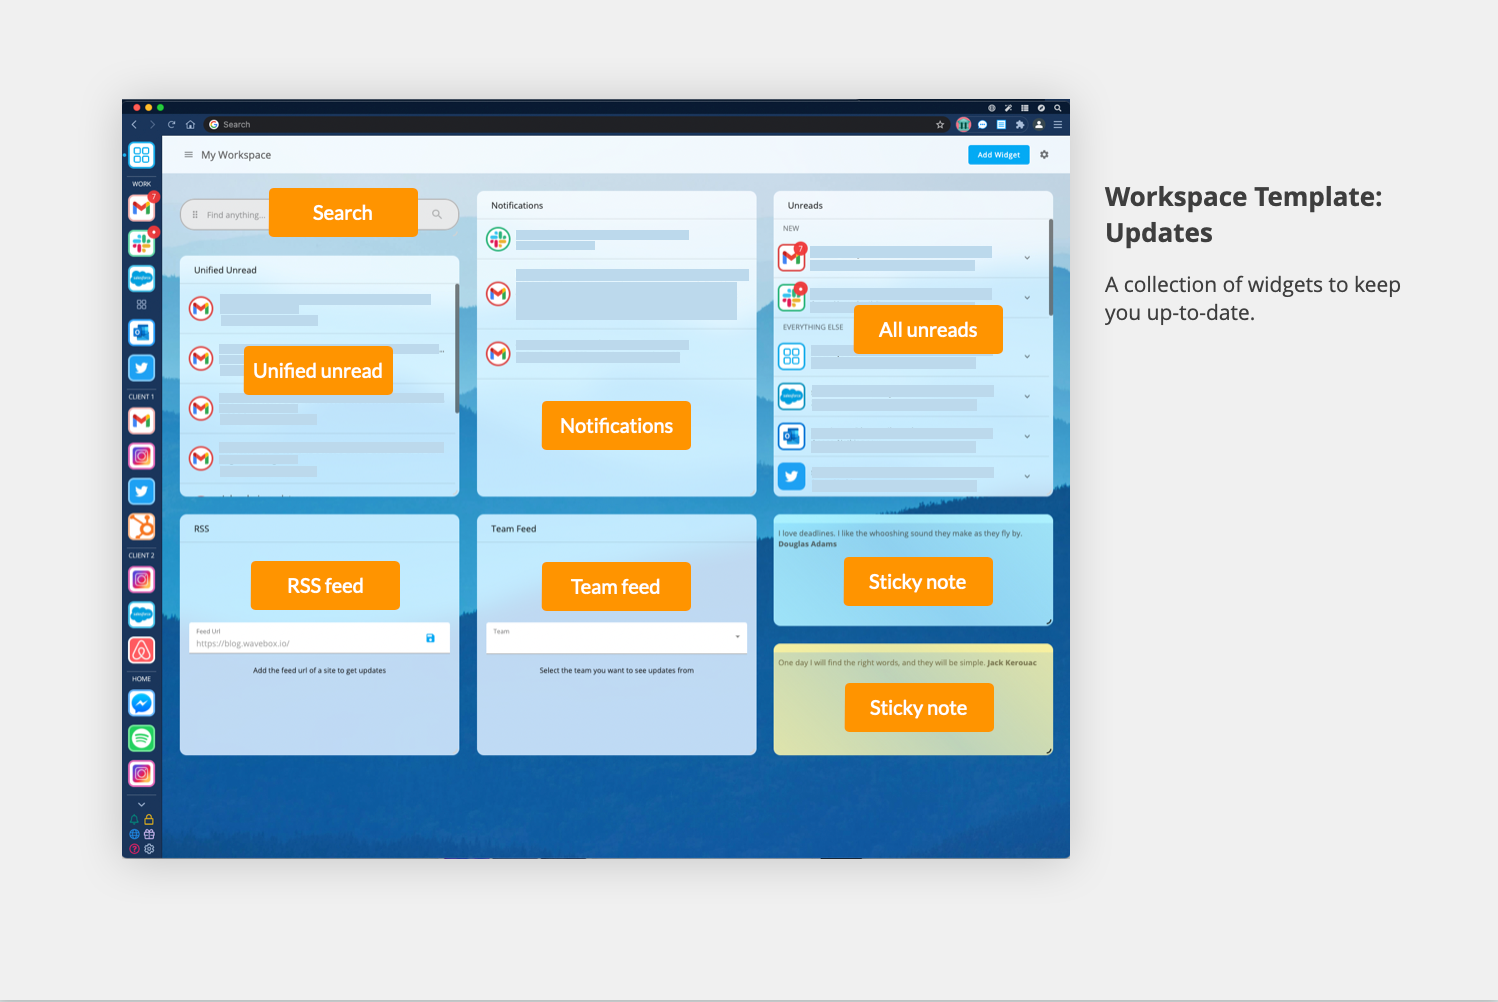
Updates - A selection of widgets to keep you up-to-date, including all the Mini Menu feeds - notifications, unread, and unified unread. If you have a team, then you can stay up-to-date using the team feed widget.
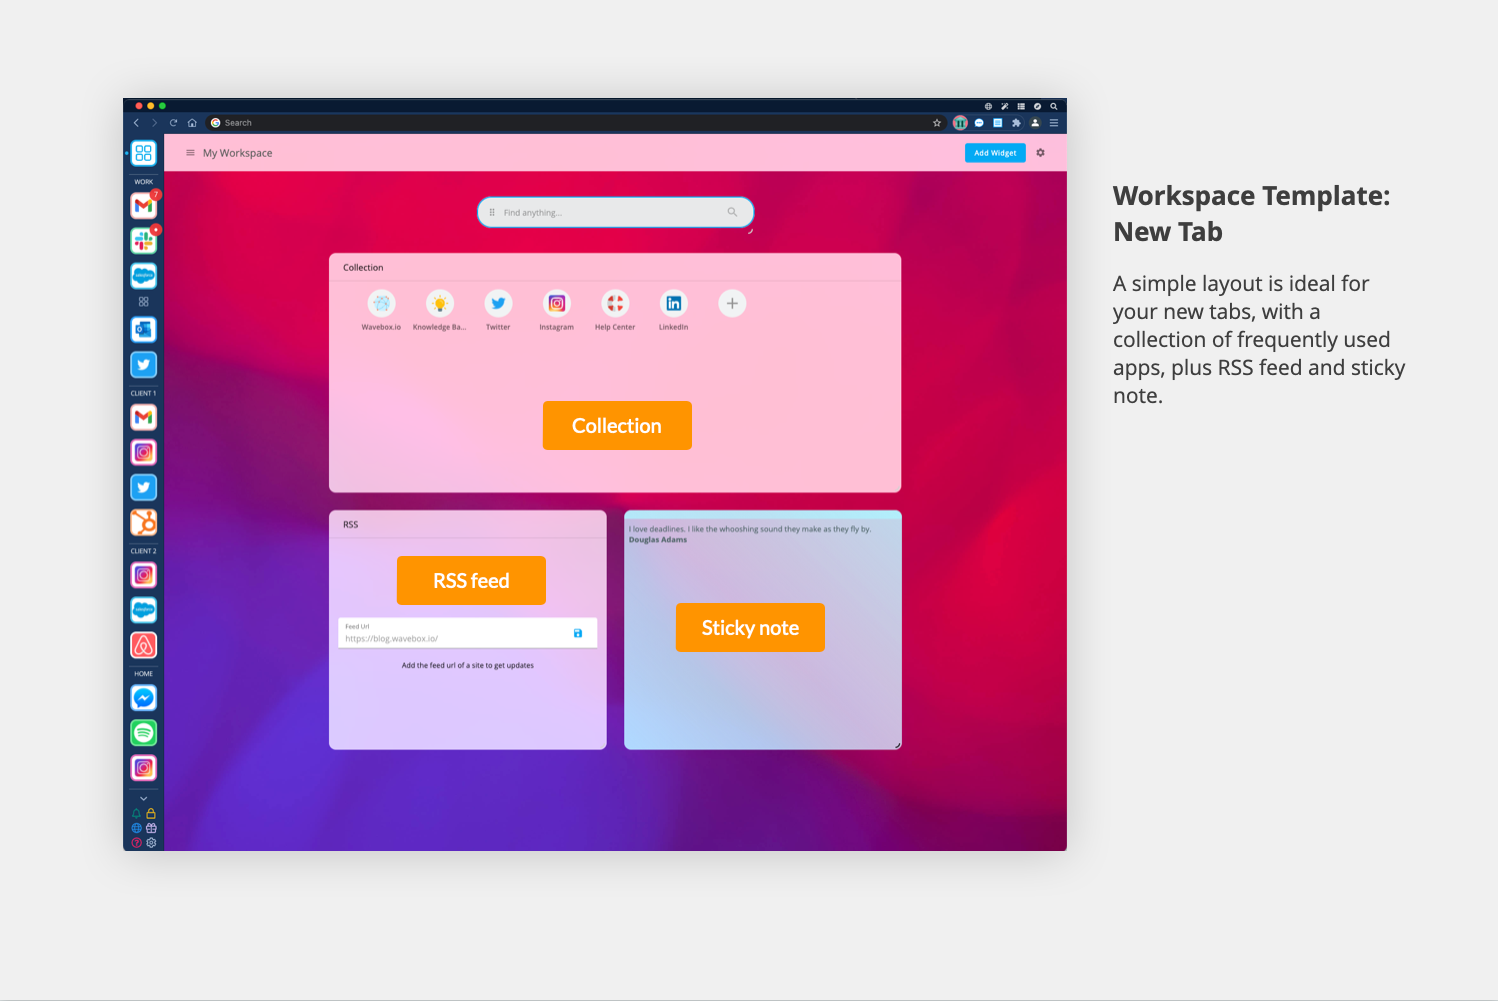
New Tab - You can keep things simple for your new tab workspace, so the template just includes a Collection widget, RSS feed and Sticky note.
Blank - Use this template if you want to start from scratch and choose your own set of widgets from the library. Just click on the 'Add Widget' button top right to get started.
Example Workspaces.
Workspaces can be used as a launchpad for all your frequently used apps and links. They offer a way of bringing together disparate web-links together under a common theme, such as a project or department. Here are some examples:
- Group Quick Links: Create a Workspace for a group to pull out frequently used apps, websites and documents.
- Projects: Create a Workspace for a particular project or department, such as a marketing campaign or sales & marketing team. 'Pin' apps and pages relating to that project in the workspace so that everyone can find it easily, such as a Trello board, or Google Drive folder.
- Clients: Create a workspace for each client, with links to their apps.
- Onboarding: Use Workspaces to onboard new users with all the apps and links they need to get up-and-running quickly.
- Teams: Create a Workspace for your team, with Collections for projects, team tasks, using the Team Feed widget to keep everyone up-to-date.